Building a Standing Desk
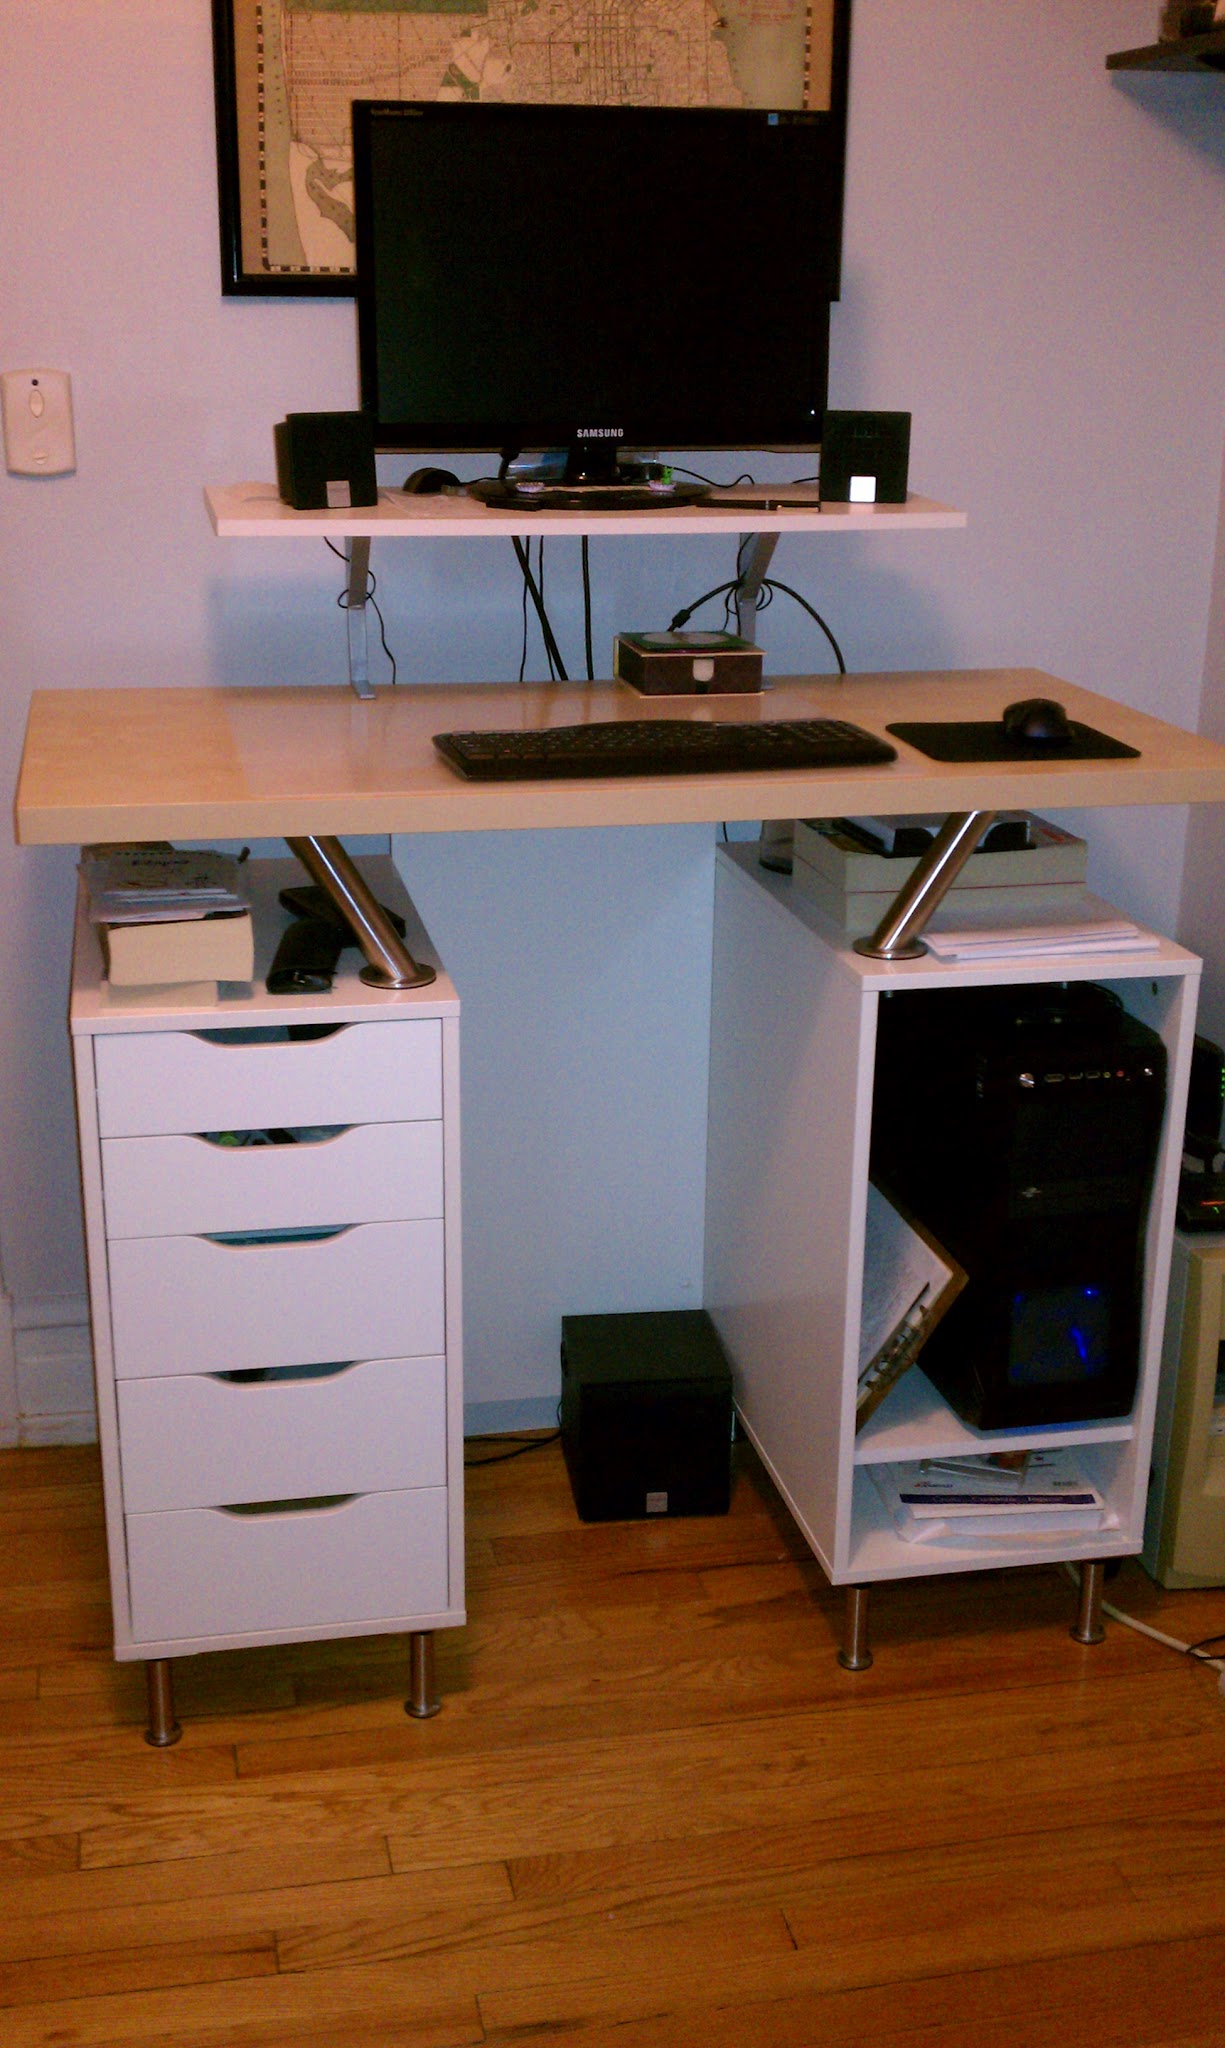 Using ideas from other standing desks on IKEA Hackers, I came up with my own version. I call it the VIKA standing desk, since it uses mostly VIKA system products. The entire project cost about $260 (without taxes). I also had to get a few supplies from Lowe's (though Home Depot carries the same products - Lowe's was on the way). Here's a rough description of what I did. Links to what you'll need.
- VIKA drawers http://www.ikea.com/us/en/catalog/products/10192824/
- VIKA storage unit http://www.ikea.com/us/en/catalog/products/60192826/
- CAPITA legs (2) http://www.ikea.com/us/en/catalog/products/20049538/#/20054563
- CAPITA brackets (2) http://www.ikea.com/us/en/catalog/products/40051196/
- VIKA AMON table top (47.25 x 23.625 inch) http://www.ikea.com/us/en/catalog/products/50219275/#/60117016
- EKBY shelf table brackets http://www.ikea.com/us/en/catalog/products/10168720/
- ANTONIUS shelf http://www.ikea.com/us/en/catalog/products/10104813/
- STIG bar stool http://www.ikea.com/us/en/catalog/products/10152700/
- Melamine shelf http://www.lowes.com/pd_17190-62348-LO17190_0__
- Backets for back http://www.lowes.com/pd_315711-1277-DPB118_0__
- Backets to join back and table top http://www.lowes.com/pd_315680-1277-DPB115_0__
I started by putting the drawers and the cabinet together per the instructions. But I left out the drawers and left off the door. Then I put the legs on the bottom outer corners of those (four each - you'll need two sets). The final height of the desktop is about 40 inches, you could switch out the CAPITA legs for the different sizes, if you like to make your desk higher. The estimation for your table top is up to your elbow with arms bent, flat feet, and correct posture (get a friend to help you measure). Next put those upright and pushed them against the wall so I could line up the back and attached the melamine between them with the flat brackets from Lowe's. I measured the melamine to be above the drawers and cabinet the same as the CAPITA brackets would be (6.875 inch). I used the screws supplied with the brackets, which are just about 1 mm too long. So you can tape down the melamine first or only screw them in 99% (or buy slightly short screws). There may be cracks in the melamine if you aren't careful.
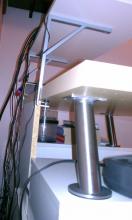 After that, I figured out where I wanted the table top brackets (this is really up to you). So make a plan in your head and start measuring. I attached the brackets to the table top with the screws. I used a drill to make the holes for the bolts in the top of the drawers and cabinet. The bolts will come down a bit inside the two (exactly enough height for the top drawer to continue working). The top, for the monitor, I used the instructions for the EKBY bracket and attached it to the table top. You could, of course, get a smaller shelf if you'd prefer. I chose this one because it was larger and I wanted space for my speakers. Ultimately, I left the door off of the cabinet because I wanted a cooler computer, but it wouldn't have fit anyway because I have a huge case. If you had a smaller computer, you could put the door on and make some air flow holes instead. Feel free to leave your adjustments to this standing IKEA hack desk.
 After that, I figured out where I wanted the table top brackets (this is really up to you). So make a plan in your head and start measuring. I attached the brackets to the table top with the screws. I used a drill to make the holes for the bolts in the top of the drawers and cabinet. The bolts will come down a bit inside the two (exactly enough height for the top drawer to continue working). The top, for the monitor, I used the instructions for the EKBY bracket and attached it to the table top. You could, of course, get a smaller shelf if you'd prefer. I chose this one because it was larger and I wanted space for my speakers. Ultimately, I left the door off of the cabinet because I wanted a cooler computer, but it wouldn't have fit anyway because I have a huge case. If you had a smaller computer, you could put the door on and make some air flow holes instead. Feel free to leave your adjustments to this standing IKEA hack desk.
Category: